쿠버네티스 오류 해결: The connection to the server localhost:8080 was refused - did you specify the right host or port
쿠버네티스에서 kubectl get pods 등 여러 명령어를 치더라도 아래와 같이 에러를 반환하는 경우가 있다.
The connection to the server localhost:8080 was refused - did you specify the right host or port

원인: 마스터노드에서의 kubectl 관련 config가 설정이 되지 않았기 때문
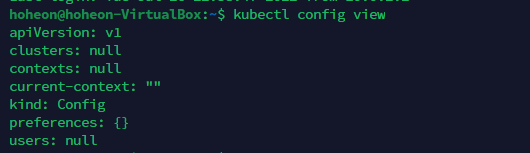
쿠버네티스 초기화 내 config가 설정이 안되어있는 경우로 생각된다. 실제로 master 노드에서의 config을 확인해보면 아래와 같다.
해결방법1: (마스터노드만) kubeadm을 이용한 마스터노드의 초기화
쿠버네티스 kubeadm을 설치가 안되어있다면 설치가 필요하고, 설치했음에도 에러가 떴다면 초기화 해주는 과정이 필요하다.
설치를 한적이 없으면, 여기 URL 에서 kubeadm을 설치하는 과정을 따라하여 설치한다. 아래의 리눅스 운영체제 또는 패키지관리도구를 이용해서 설치할 것인지 말것인지 결정해서 1~4번까지 복붙하여 따라한다. 설치되어있으면 kubeadm을 초기화한다.

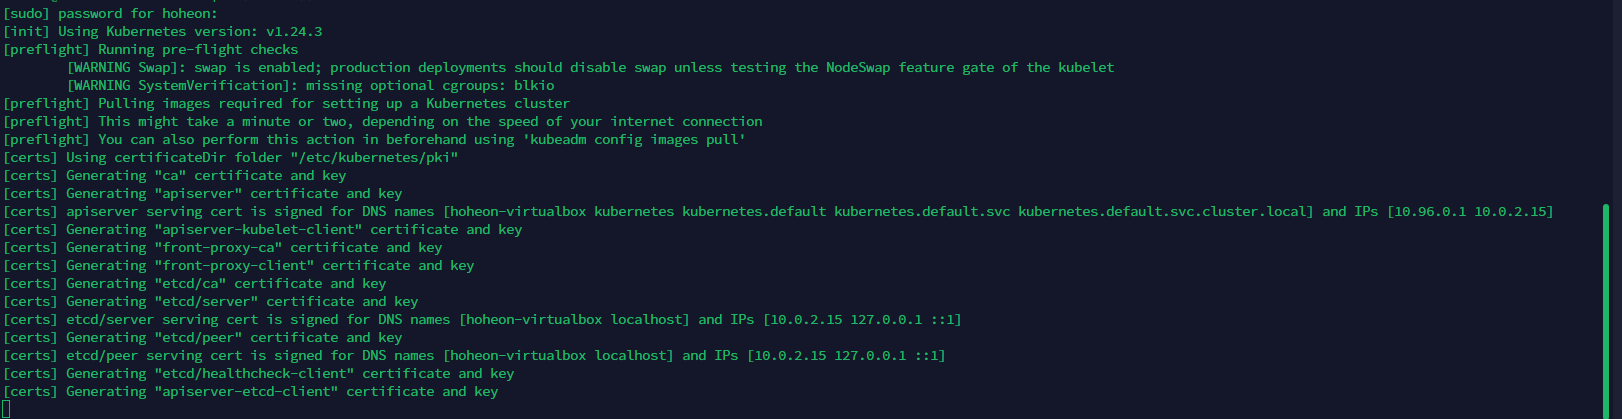
아래의 명령어로 쿠버네티스 마스터노드의 kubeadm을 초기화해준다.
sudo kubeadm init // 처음 설치한 경우
sudo kubeadm reset // 이미 설치한 경우
위의 명령어로도 쿠버네티스 마스터노드가 초기화 안되고 에러가 뜨는 경우가 발생했는데, 필자의 경우는 도커의 설치가 되지않아 초기화되지 않았다. 마찬가지로 도커설치도 진행한다. docker.io라고 할지 어떤 종류를 할지는 sudo apt-get install docker을 한번 실행해보면, 가이드를 해주는 설명이 출력된다.
sudo apt-get install docker.io
그리고나서 다시 kubeadm으로 마스터노드를 초기화 한다. 그러면, 아래와 같이 정살정으로 kubectl 관련 서비스들이 생성된다.
관련 리소스들이 제대로 설치가 되었는지 아래와 같이 namespace을 검색해본다.
# kubectl get pods --all-namespaces
해결방법2: WorkerNode인경우
마스터노드와의 Join이 안되는 경우에 이런 문제가 발생 수 있다. 마스터노드에서 다음의 명령어로 해당 노드가 제대로 참여중인지 확인한다. 아래의 명령어로 control-plane과 해당 worker노드가 확인되어야한다. 확인되지 않으면, 워커노드가 클러스터로 join이 안된것이다.
# kubectl get nodes
워커노드가 클러스터에 조인이 안되었음을 확인했다면, 일단 워커노드를 초기화한다.
# kubeadm reset그리고 마스터노드에 join에 필요한 hash, cluster API및 포트, token정보를 받아온다.
// 마스터노드에서
root@k8s-master:/home/ubuntu# kubeadm token create --print-join-command
kubeadm join 172.16.2.231:6443 --token 8yxfot.ktr4irill5hqw6h7 --discovery-token-ca-cert-hash sha256:bd91d60981b5774add11106cd42e1f8d6db18b241b5fd529b0d638e71
다시 워커노드에서 위의 명령어를 복붙하여 조인한다.
root@k8s-test:/home/ubuntu# kubeadm join 172.16.2.231:6443 --token 8yxfot.ktr4irill5hqw6h7 --discovery-token-ca-cert-hash sha256:bd91d60981b5774add11106cd42e1f8d6db18b241b5fd529b0d638e713522494
[preflight] Running pre-flight checks
[preflight] Reading configuration from the cluster...
[preflight] FYI: You can look at this config file with 'kubectl -n kube-system get cm kubeadm-config -o yaml'
[kubelet-start] Writing kubelet configuration to file "/var/lib/kubelet/config.yaml"
[kubelet-start] Writing kubelet environment file with flags to file "/var/lib/kubelet/kubeadm-flags.env"
[kubelet-start] Starting the kubelet
[kubelet-start] Waiting for the kubelet to perform the TLS Bootstrap...

This node has joined the cluster:
* Certificate signing request was sent to apiserver and a response was received.
* The Kubelet was informed of the new secure connection details.

Run 'kubectl get nodes' on the control-plane to see this node join the cluster.